Wednesday 14 December 2011

Sunday 4 December 2011
Sunday 27 November 2011
Thursday 24 November 2011
Wednesday 16 November 2011

Tuesday 8 November 2011
Saturday 29 October 2011

Thursday 27 October 2011
Monday 17 October 2011
Saturday 15 October 2011

Tuesday 11 October 2011
Wednesday 7 September 2011

Thursday 25 August 2011
NEW BLOG!
On the upside it will be easier and fresher for me and you :)
it is www.yourweddingphotographerblog.com
and don't forget to check out my main site too at www.andrewscottclarke.com
Thanks :)
Sunday 21 August 2011
Monday 4 July 2011
Day 182 - Guys & Dolls
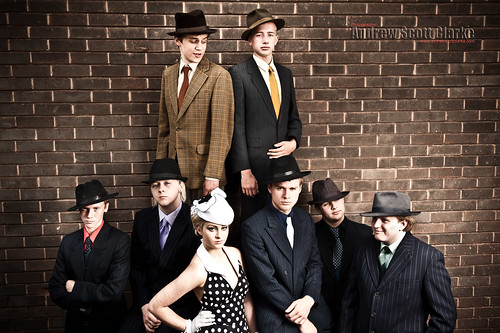
Day 182 - Guys & Dolls
Press Shot for Local Rag, for the Young Inspirations theatre company promoting upcoming show "Guy's n Doll's"
Multiple SB-900's fired with CLS su-800
Day 181 - All logged out

Day 181 - All logged out
Found a pile of wood and thought it wood be interesting lol.
3 x SB-900 on tri flash bracket with CTO gel and 2500k whitebalance. fired with SU-800 and CLS with +2 ev stops on ttl mode
Friday 1 July 2011
Day 179 - Summer Daze
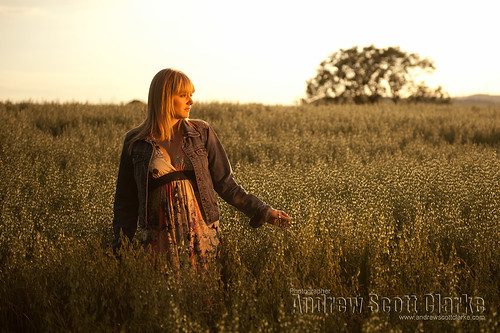
Day 179 - Summer Daze
Just scouting new locations this evening for some engagement shoots etc had to get a quick shot before we lost the sun behind some Black clouds.
This is shot wide open at f2.8 at 1/2000 iso 100.
Lit by two SB-900's with CTO full gel's fired by SU-800
Rim light was the big ol sun!
Love high speed sync!
Saturday 25 June 2011
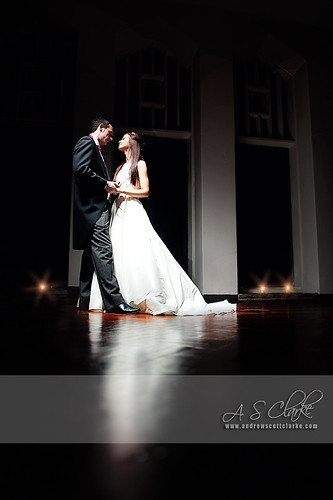
Flash technique 1 - turning daylight into night
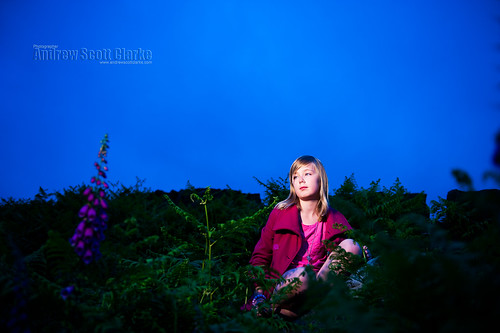
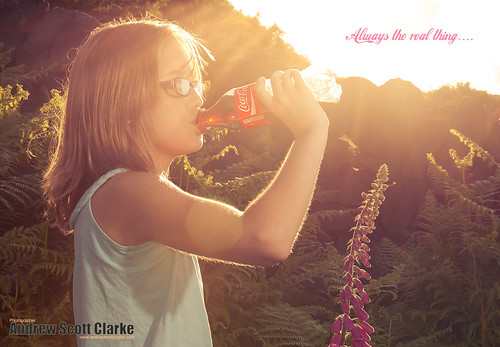
Flash technique 1 - turning daylight into night
Update for the Blog, thought i would share a bit of flash technique and how to create dramatic daytime pictures..... well, dramatic lol.
This photo is taken in afternoon light unfortunately the sun wasnt shining or it would have totally added to the effect, I will post one when i get the chance so you can see how cool this technique looks with the sun shining.
What i'm basically trying to do here is make the light look like evening light when you get those lovely cold blues. To acheive this i've turned the WB down all the way in the D700 to 2500k to basically turn everything blue, to make sure the subject is not blue i have used a CTO gel on the flash heads to balance out the WB on the subject (my flash's was three SB-900's on a lastolite tri-flash with Full CTO gels.)
Now to dim the image and keep a shallow depth of field i have had to high speed sync the flashes in this case to 1/3200 of a sec at f2.8 (we can sync all the way up to 1/8000 if we need to on really bright days, this gives the image its dramatic stance. I fired the remotes from the D700's on board flash in commander mode.
This technique works amazingly well on wedding shoots when you want to acheive something a little different, especially with the sun shining and a little flair :)
Hope this was informative for you :)
Friday 24 June 2011
Day 172-365 - Typical
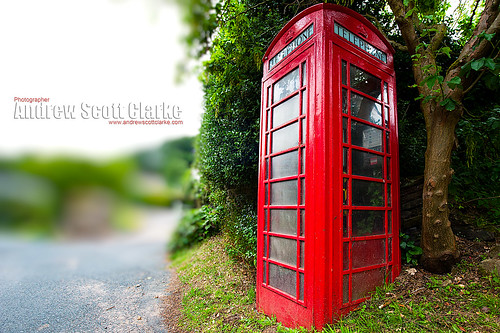
A Typical english Village with Typical Red telephone box, this photo is an example of how to use extreme wide angle lenses, This is at 15mm, the trick with wide angle lenses is to get close, not to get it all in!.
Monday 20 June 2011
Day 168-365 - Blubell wood Charity Golf Tournement
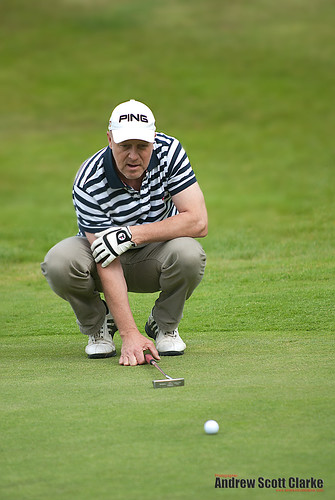
Day 168-365 - Blubell wood Charity Golf Tournement
Sorry for the delay in uploads but i have been taking the pics, just not managed to upload so here we go, one from saturdays Golf Tournement for the Bluebell wood Charity
I used the 70-200 on the D200 to get an effective 300mm focal range so i could keep a bit of distance
Monday 13 June 2011
Wednesday 8 June 2011
Day 158-365 - Old Blackberry Photo Re-Edit
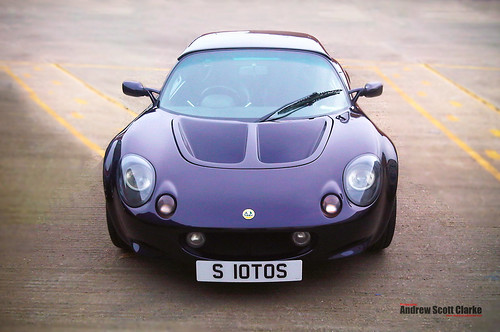
Day 158-365 - Old Blackberry Photo Re-Edit
Instead of a new photo tody ive decided to see what i can do with an old camera phone photo, this one was taken with a Blackberry 8900 (3.2mp), it is of my old car (hich i do miss but ponly covered 6000 miles in it in the seven years i owned it!. thats how practical it was - and forget transporting any camera gear in it!.
Just goes to show that a simple camera phone is effective under limited circumstances.
Tuesday 31 May 2011
DIY fluorescent light bank trials
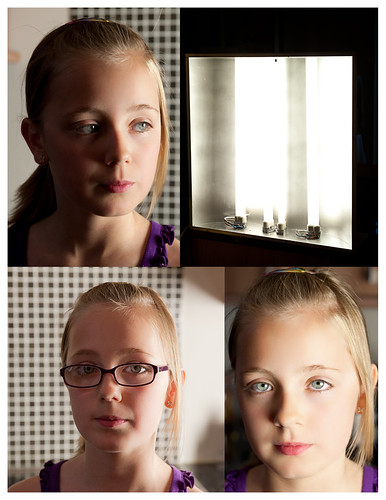
day 150-365 DIY light bank trials
Well ive got one light rigged up and wired up. No barn doors yet they arrive later this week (600x450mm). First impressions are very good with a nice soft light cast . I will get the other one rigged up tomorrow. These images were taken at iso 200, f5.
The lights themselves arent overly heavy either and will be quite easily handled once ive got the bracket on and attach a handle to one of the ends.
if i was to build these lights from scratch with new components i think they would probably cost around £200 each as the iguzzini fittings are rather expensive. you could use a cheaper doner and probably get it done for half the price.
Again the lamps fitted are 80w each at colour 840 which is a temp of 4000k each producing 6000 lumins.
Monday 30 May 2011
PLEASE VOTE
VOTE NOW PLEASE _ CLICK HERE :)
Sunday 29 May 2011
DIY Fluorescent light bank - part 2
 | |
| mmmm nice chrome! :) |
Hopefully ive managed a solution to the rear of the unit for encasing etc (and generally making it look like a professional piece of equipment!). M wife happens to work at a school where they have a nice machinery shop with vacuum forming tools!, so hopefully i am going to be able to form a nice polycarbonate back which will be both strong and light! YAY!. - plus i could use a funky colour also!.
I was going to make the barn doors out of aluminium but have now decided on some black sheet plastic (600 x 400mm) and will bond it to hinges ( small 12mm butt hinges ). The plastic should be nice and rigid and light weight. I need to keep the weight down as much as possible as the main unit is sheet steel so i don't want to add too much weight as it may become unwieldy on a stand.
Stay tuned for further updates.......
ciao for now
Friday 27 May 2011
DIY Fluorescent Light Bank Part 1
 |
| Iguzzini Light fitting modified with extra lamp holders. |
It just so happens i had the perfect Donner components in the garage, i am using some iguzzini light fittings that was made for metal pan ceilings and equipped with capacity for two 80W COMPACT FLUORESCENT LAMPS, i have added another two to each unit to make a total of four. ( 4 x 80 = 320w) each lamp is 6000 lumen's!. The fittings themselves are a shaped pan which are elliptical and meet in the middle so should be able to throw light out in a uniform manner. Plus being iguzzini they will have been designed to death to give even light distribution, i might look up the photometric data for this fitting and post it in part two.
 |
| Rear of fitting showing additional control gear |
This is phase one where i have adapted the units to accept the additional control gear and lamp holders. i have marked out the slots ready to be cut for the two extra lamps as they slightly overlap the unit to keep them in position. The lamps i have to use are Philips master PL-L4P they are an 80w lamp with output of 6000lm (lumen's for all you commoners lol ) and colour 840 which is a cool white with a tri phosphor coating. this gives a colour temperature of 4000 kelvin!.
 |
| The Philips master lamps! |
I need to do some searching and find the best materials to encase the unit but I'm thinking of perforated sheet metal as it will aid ventilation plus keep the weight down. I'm planning on spraying the inside a nice silver chrome to help reflect the light round and will probably paint the exterior a charcoal grey colour. I think i will attache the metal barn doors which I'm also going to manufacture with piano hinges riveted or bonded to the frame and then need to come up with mounting options to allow tilt and swivel on a light stand!
Stay Tuned :)
Wednesday 25 May 2011
Andrew Scott Clarke's photostream


Andrew Scott Clarke's photostream on Flickr.
check out my flickr stream sometime