day 150-365 DIY light bank trials
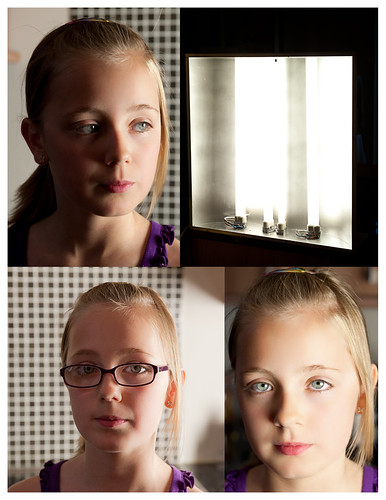
Well ive got one light rigged up and wired up. No barn doors yet they arrive later this week (600x450mm). First impressions are very good with a nice soft light cast . I will get the other one rigged up tomorrow. These images were taken at iso 200, f5.
The lights themselves arent overly heavy either and will be quite easily handled once ive got the bracket on and attach a handle to one of the ends.
if i was to build these lights from scratch with new components i think they would probably cost around £200 each as the iguzzini fittings are rather expensive. you could use a cheaper doner and probably get it done for half the price.
Again the lamps fitted are 80w each at colour 840 which is a temp of 4000k each producing 6000 lumins.
Tuesday 31 May 2011
DIY fluorescent light bank trials
Monday 30 May 2011
PLEASE VOTE
VOTE NOW PLEASE _ CLICK HERE :)
Sunday 29 May 2011
DIY Fluorescent light bank - part 2
 | |
| mmmm nice chrome! :) |
Hopefully ive managed a solution to the rear of the unit for encasing etc (and generally making it look like a professional piece of equipment!). M wife happens to work at a school where they have a nice machinery shop with vacuum forming tools!, so hopefully i am going to be able to form a nice polycarbonate back which will be both strong and light! YAY!. - plus i could use a funky colour also!.
I was going to make the barn doors out of aluminium but have now decided on some black sheet plastic (600 x 400mm) and will bond it to hinges ( small 12mm butt hinges ). The plastic should be nice and rigid and light weight. I need to keep the weight down as much as possible as the main unit is sheet steel so i don't want to add too much weight as it may become unwieldy on a stand.
Stay tuned for further updates.......
ciao for now
Friday 27 May 2011
DIY Fluorescent Light Bank Part 1
 |
| Iguzzini Light fitting modified with extra lamp holders. |
It just so happens i had the perfect Donner components in the garage, i am using some iguzzini light fittings that was made for metal pan ceilings and equipped with capacity for two 80W COMPACT FLUORESCENT LAMPS, i have added another two to each unit to make a total of four. ( 4 x 80 = 320w) each lamp is 6000 lumen's!. The fittings themselves are a shaped pan which are elliptical and meet in the middle so should be able to throw light out in a uniform manner. Plus being iguzzini they will have been designed to death to give even light distribution, i might look up the photometric data for this fitting and post it in part two.
 |
| Rear of fitting showing additional control gear |
This is phase one where i have adapted the units to accept the additional control gear and lamp holders. i have marked out the slots ready to be cut for the two extra lamps as they slightly overlap the unit to keep them in position. The lamps i have to use are Philips master PL-L4P they are an 80w lamp with output of 6000lm (lumen's for all you commoners lol ) and colour 840 which is a cool white with a tri phosphor coating. this gives a colour temperature of 4000 kelvin!.
 |
| The Philips master lamps! |
I need to do some searching and find the best materials to encase the unit but I'm thinking of perforated sheet metal as it will aid ventilation plus keep the weight down. I'm planning on spraying the inside a nice silver chrome to help reflect the light round and will probably paint the exterior a charcoal grey colour. I think i will attache the metal barn doors which I'm also going to manufacture with piano hinges riveted or bonded to the frame and then need to come up with mounting options to allow tilt and swivel on a light stand!
Stay Tuned :)
Wednesday 25 May 2011
Andrew Scott Clarke's photostream


Andrew Scott Clarke's photostream on Flickr.
check out my flickr stream sometime
Wednesday 18 May 2011
Nikon SB-900 Vs Sigma 530 DG Super Review
I've looked all over the net to see if anyone has put these head to head in terms of output and useability (couldnt find any!) so ive done one - yay!!!
 |
| Sigma 530 DG Super - Nikon SB-900 |
The reason ive done this review is that i started out with my nikon cameras using the Sigma and eventually the Nikon, which i'll get to why further on in the review. Lets start off by saying i was more than happy with my two sigma 530 DG supers i have and they always performed great apart from a little teathing with my triggers but that got solved with a bit of selotape on a few of the triggers terminals. (JOB DONE). The Sigmas have worked well also with nikons CLS system the only niggle is they are a pain in the ASS having to program them through the hot shoe each time!.
First off lets have a look at a few pictures of the two flashes side by side just to show the difference in size and design, this is an area that the SB-900 has had criticism du to its large size. I find that these two flashes are almost the same size wise ( a couple of milimetres in height )


As you can see there isn't much difference, the Nikon is a couple of mm longer and fatter but this is inconsiquential when you pick both of them up as the Nikon feels far superior both ergonomically and quality. The quality comparison is what you pay for with the nikon where the Sigma is around a third cheaper. (not a massive saving!)
The Controls of the flashes are both set out well and both easy to use - in my opinion the Nikon definately has the edge with the JOG dial plus the increments of power go all the way down to 1/128 where the sigma only steps down to 1/64 - sometime's that extra stop really count's.
The way the flash connects to the camera hot shoe is also completely different, The Sigma uses a plastic locking ring which feels like it belong's to a £30 flash rather than a £250 flash. This is one of the areas where the Sigmas build quality is let down significantly. The Nikon however has a very nice switch that you engage once on the hot shoe to lock the flash in place. Very Slick.


The LCD on the Nikon is superior with a large easy to display reading, The Sigma is also easy to read - Far more so than the 430 Super i used to have!. Again from the pictures you can see the difference in quality with the switches - the Nikon oozes class.
The Nikon CLS system is embodied in the SB-900 flash where at the flick of a switch it can go from a dedicated flash to a remote flash or a master flash able to control three groups over four channels. you can utilise some features of the CLS system with the Sigma and they generally dont do a bad job, it just isnt as flexible as the Nikon. In fact i was so impressed with the ease and way that the system works with the SB-900 that i now have three of them.


Above is how these flashes come and Nikon have been kind enough to include some gel filters and a diffusion dome with the pack, also a nice holster. Sigma havent been as generous - although you do get a crummy wallet that ive never used. Im not one for reading instructions but i have to say that you really do need to read the Sigma's - especially if your going to use the wireless function. No problem with the Nikon just flick the Switch onto remote!, full TTL control from the camera or other mounted SB-900.
Lets have a look how they both look on the camera and see the size of them both.
 |
| SB-900 mounted on D700 C/W MB-D10 and 24-70mm f2.8 AF-S |
 |
| 530 DG Super mounted on D700 C/W MB-D10 and 24-70mm f2.8 AF-S |
I didnt want to do a technical review - i just wanted to review my experience with both flash guns after ive used them both for a while. The Sigma is a very capable flash with some nice features if you can be bothered to read the instructions, it has performed well both on and off camera and is a powerful gun. The problem with the Sigma is if you have used the Nikon you will feel imediately let down by the build quality, but then you do get what you pay for sometimes.
The Nikon is now my prefered flash gun and as said before i now have three of them (also two of the Sigmas), ive heard rumours of over heating problems but not experienced any of them even with very heavy usage. the extra reach on the zoom range is also handy (200mm), Overall the Nikon is easy to use and a very powerful tool with the CLS system. Build quality is top notch (as you would expect from a top of the range Nikon product) it feels like a cross between a sherman tank and a finely crafted swiss watch rather than the rubbish plastic toy materials used in the SIGMA. (if only they had paid little more attention to detail!).
Bottom line is if you can afford the Nikon get one, if you cant....... dont spoil it and get someting else wait a little longer save a little more and get the Nikon, you will only live to regret it if you dont because as soon as you touch the SB-900 you will want one!
Tuesday 10 May 2011
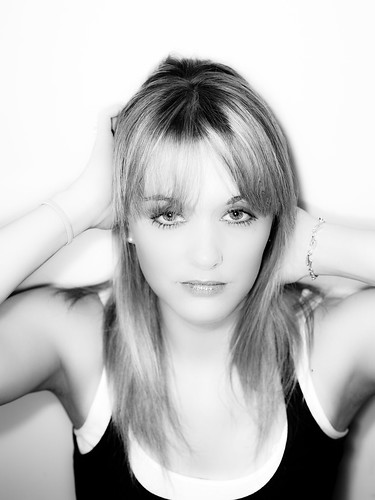
day 129-365 Bodypainting-2

Shoot yesterday with the talented Sam Galton (pro Makeup Artist) for a body paint session she had done.
www.samgalton-artist.co.uk
It must have been the windiest day in Sheffield for quite a while and because of the theme of the body paint ( surfer chic ) we went to the nearest body of water that was close enough and had boats! The wind was that bad that the sailors out on the water kept capsising in the wind!
This hapened to be Rother Valley country park and they just happen to have a sailing club there.
With not much persuasion the guys at the club allowed us and our half naked model to use one of their craft for the quick shoot. our party of one photographer quickly turned into multiples lol.
As it happens we couldnt have timed the shoot better as the storm clouds rolled in just after this shot.
Shot this with the D700 and 105 AF-DC with a SB-900 boomed with a lumodi beauty dish fired by pocket wizards.
Nikon SB-900 VS Sigma 530 DG Super (review coming soon)
Im going to do a side by side comparisson of nikon's flagship speed light and of late Sigma's flagship model just replaced by the 610.
So stay tuned over the next couple of days.
Sunday 8 May 2011
day 128-365 pushbike or pushingbike-

day 128-365 pushbike or pushingbike
Nikon F5
Nikkor 105mm AF-DC f2 @ f2
Kodak Pro T-max 400
Film shot today with the mighty F5, just a quick trip out to the park.